
Hello treasures!
I’m here with some useful tips and ideas (rather than a detailed tutorial) on using stencils to print on fabric with two separate projects.


Note: By printing with stencils, I am referring to filling the empty spaces of the stencil with paint using a tool such as a stippling brush. The stencils I am using have been cut from mylar, a thin plastic, which can be reused again and again.
An Embroidery Project:
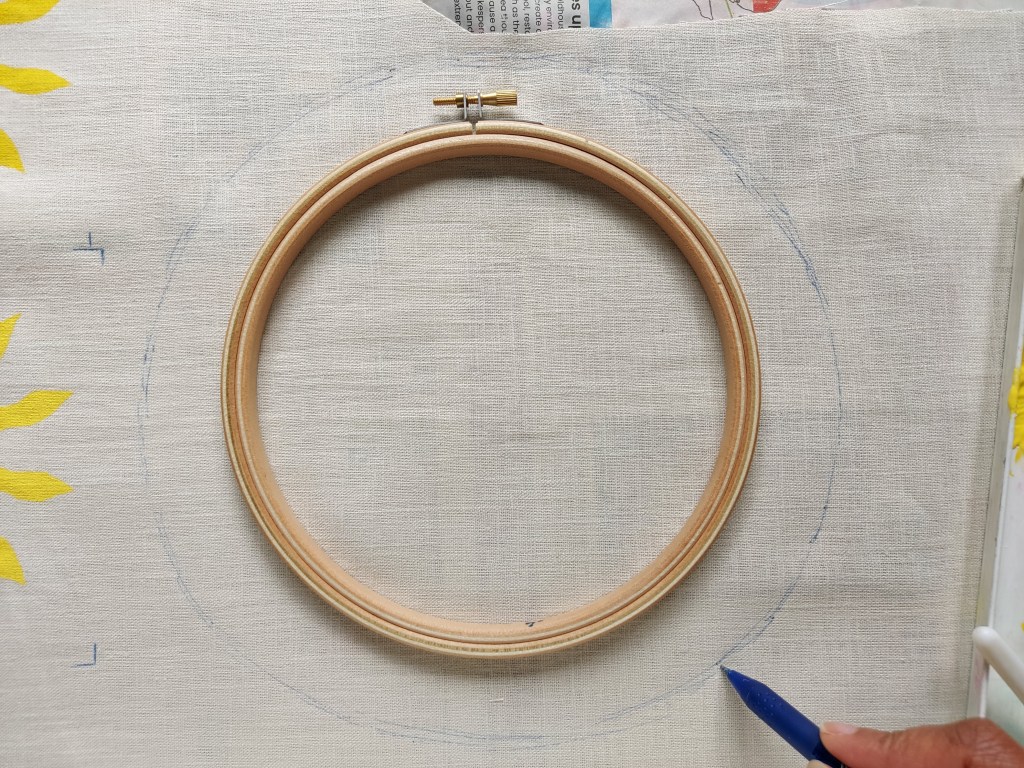
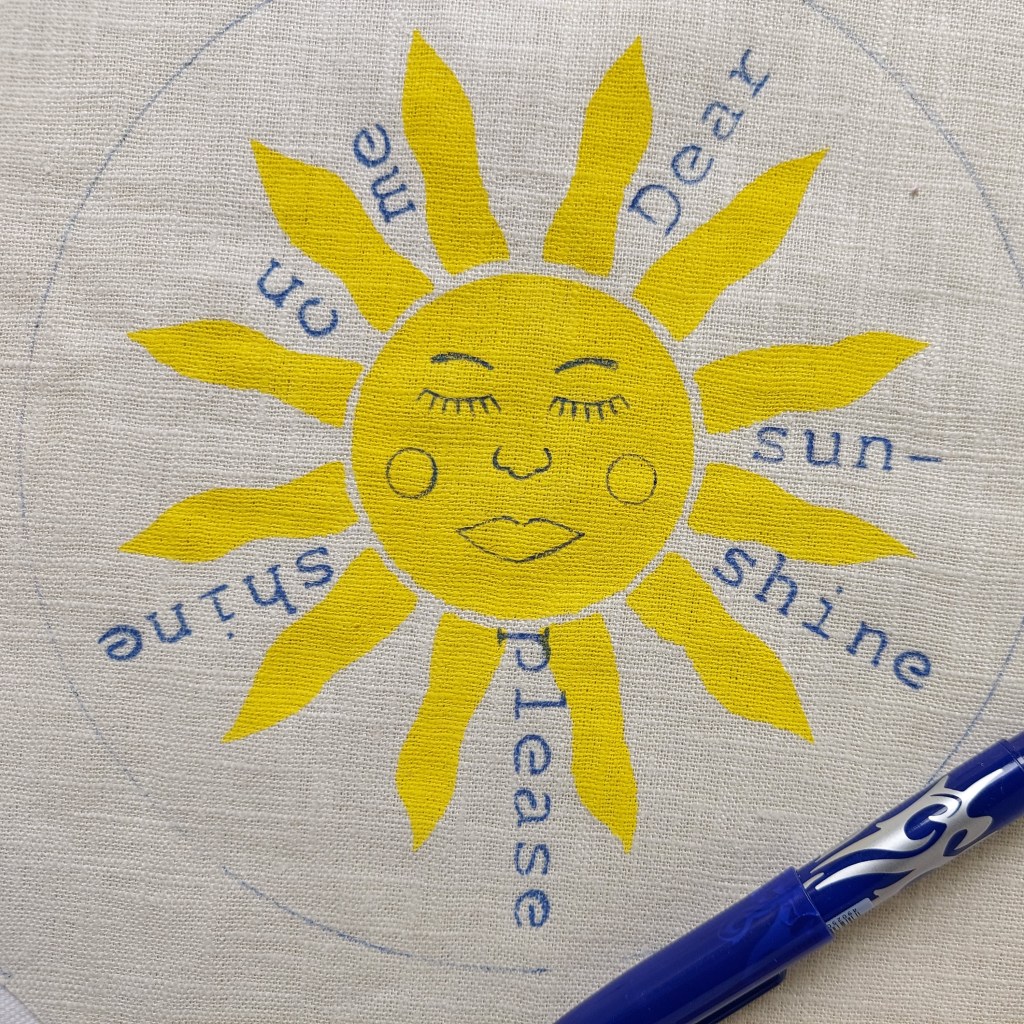
Use the inner hoop of a 7inch embroidery hoop to create a circle on your fabric using a heat erasable fabric marker. Also mark approximately 2.5-3cm from the outer hoop to create another circle.
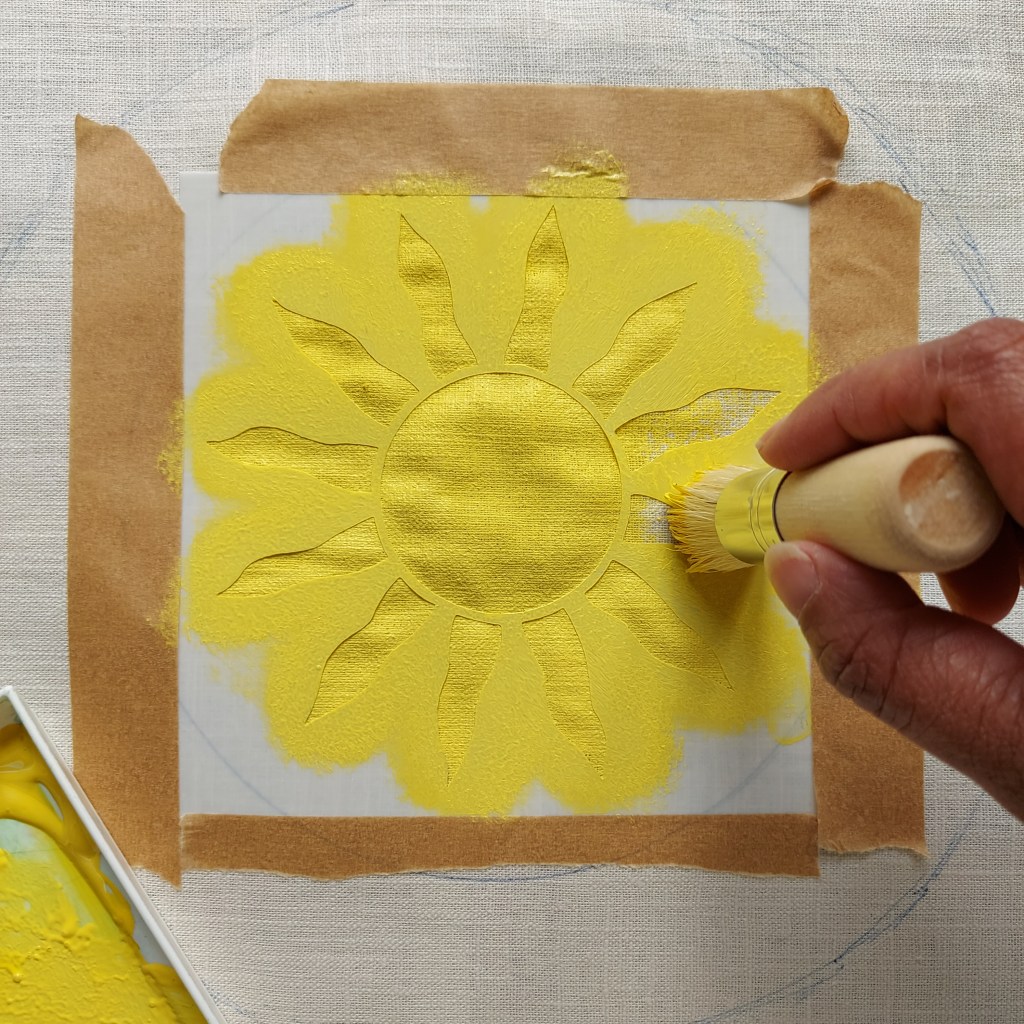
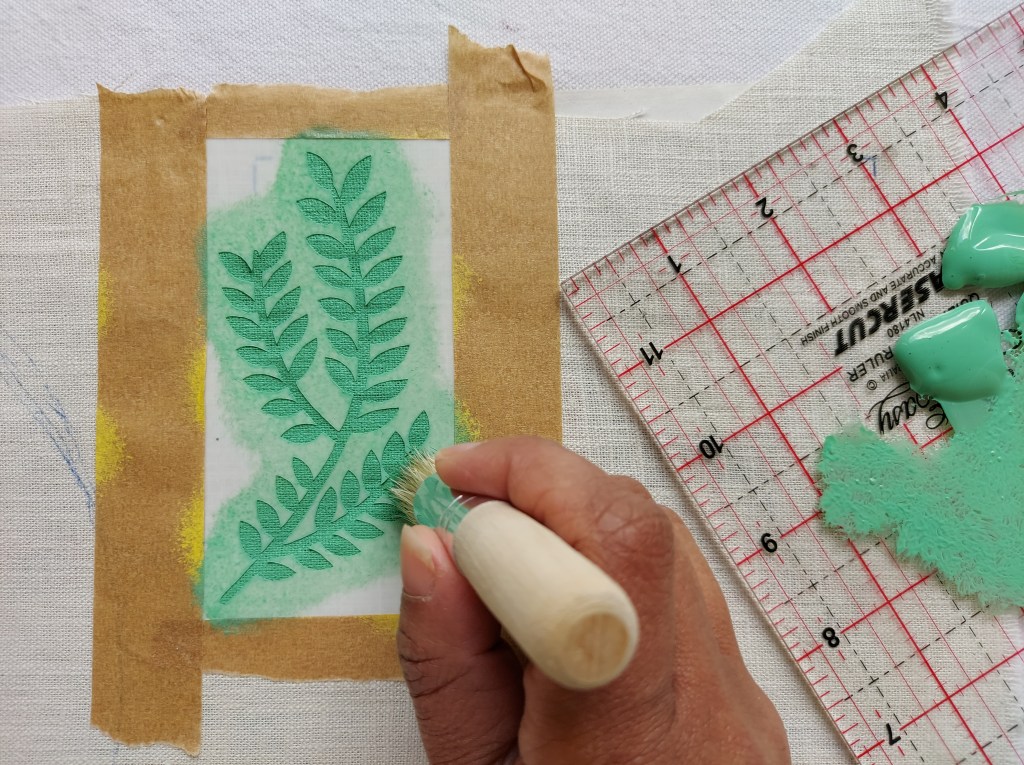
Spray temporary repositionable adhesive to the back of a stencil (I used a sunshine) and stick onto the fabric within the inner circle. Place eco tape around the edges of the stencil to prevent the fabric around the stencil from becoming marked.
Place newspaper underneath the fabric to protect your surface.
Use a stippling brush and fabric paint to fill the empty spaces of the stencil.
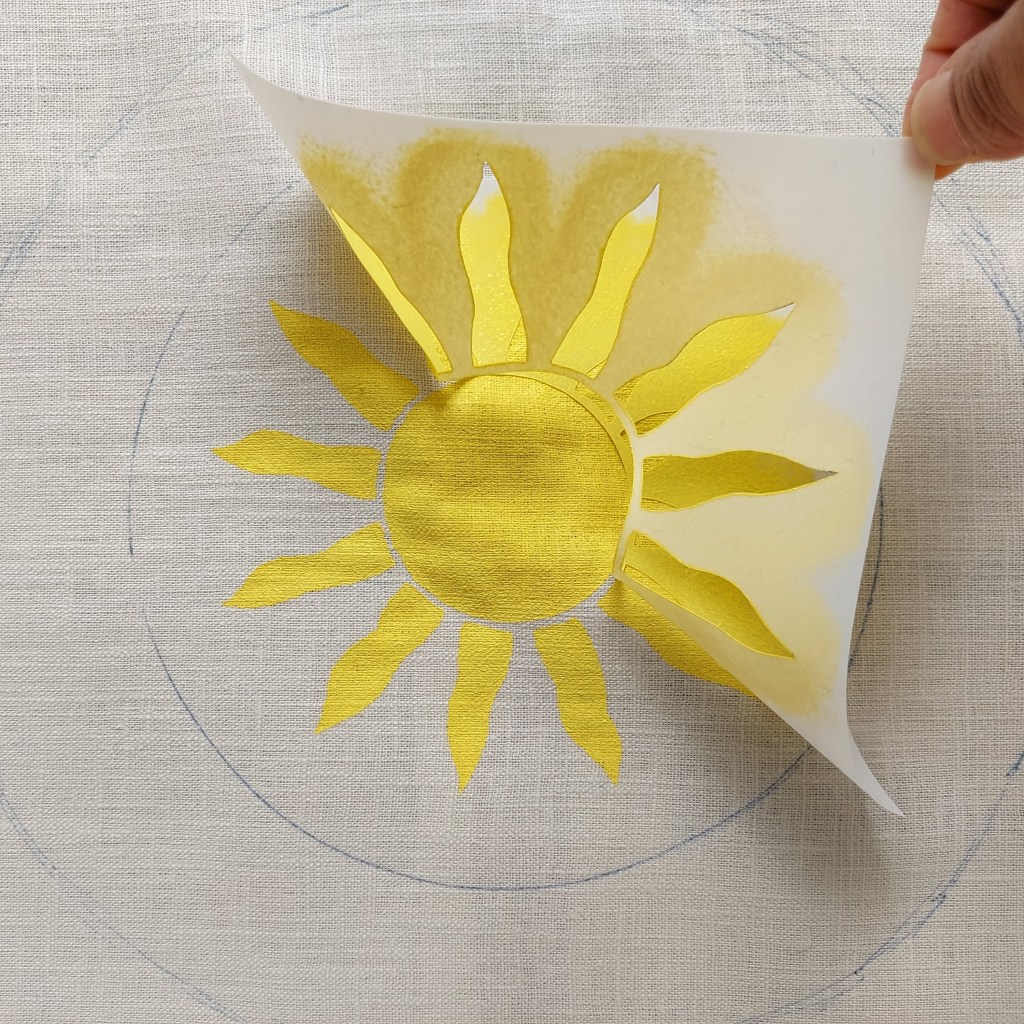
Carefully peel the stencil away from the fabric. Allow to dry.


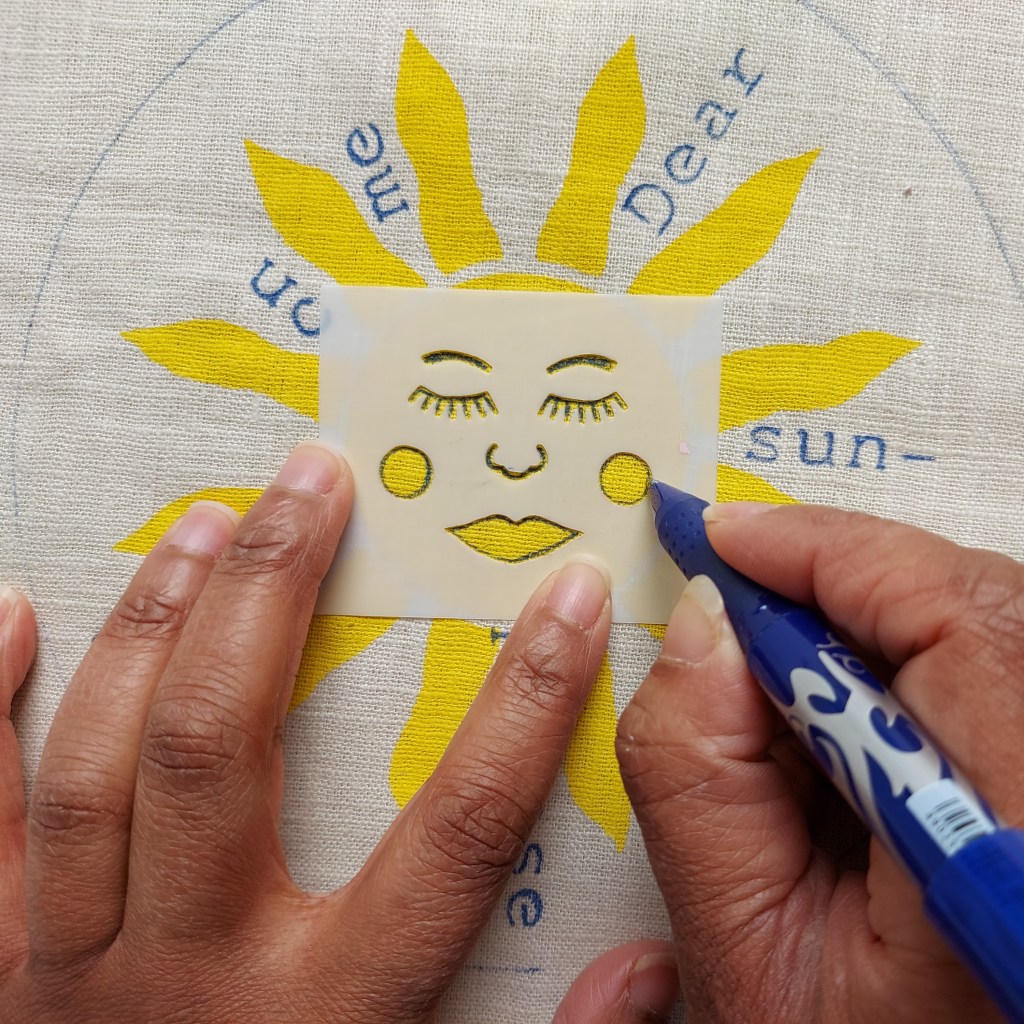
Once dry, add your chosen words and any other designs using stencils and a heat erasable fabric pen.
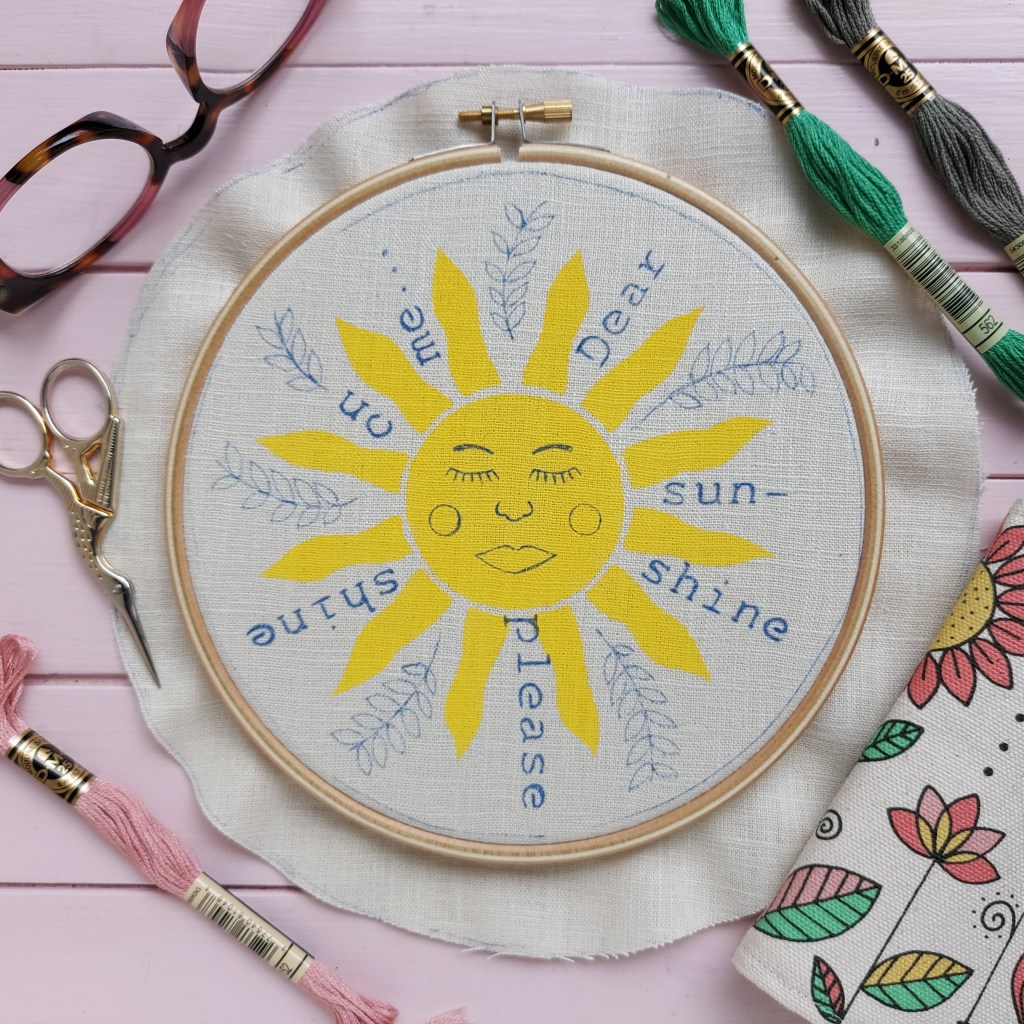
Add any extra detail freehand as I did for the botanicals here.
Use another circle of cotton or interfacing (I often use Vlieseline (Vilene) M12) to back the main fabric before mounting into the hoop.


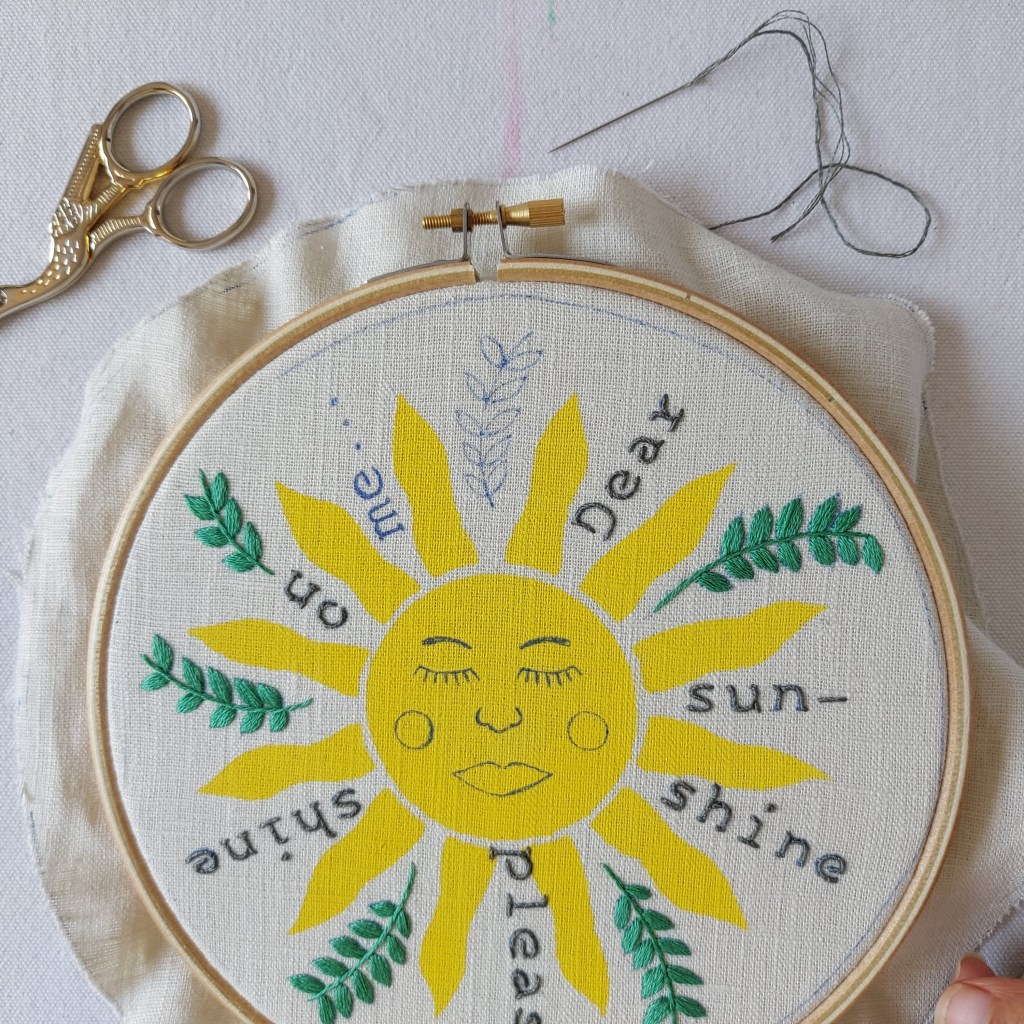
Now you can enjoy the stitching! I used whipped back stitch for the letters, the tops of the eyelashes and the nose; french knots for the 3 dots after the word ‘me’; stem stitch for the botanical central stems and the eyebrows; straight stitch for the eyelashes and satin stitch for the leaves, the cheeks and the lips.
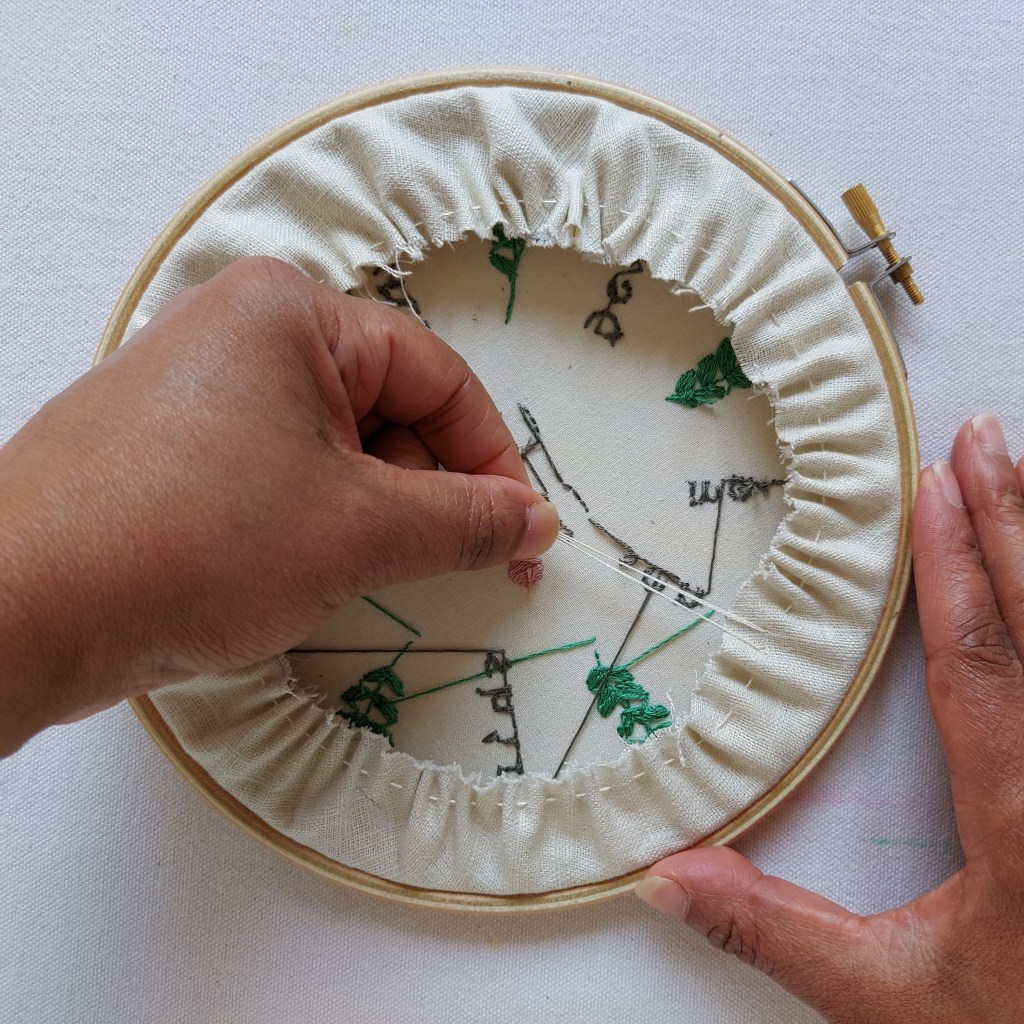
Once stitched, use steam from an iron to remove the pen markings. Use running stitch around the edge of the fabric, pull taut at the back and tie a knot. I sometimes also add a circle of felt to the back of my hoops to finish them off neatly.

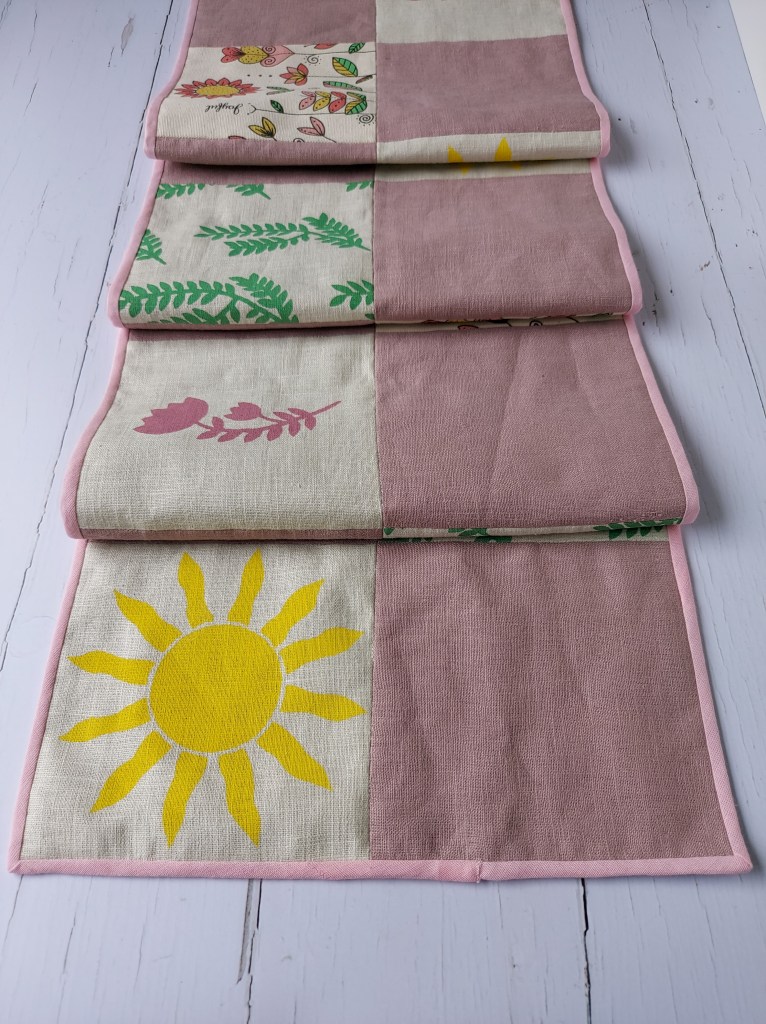
A sewing project: A printed table runner
Decide on the size of squares that you will sew together to create your table runner. Mark these squares out using a heat erasable fabric pen. Place newspaper underneath your chosen fabric to protect your surface.
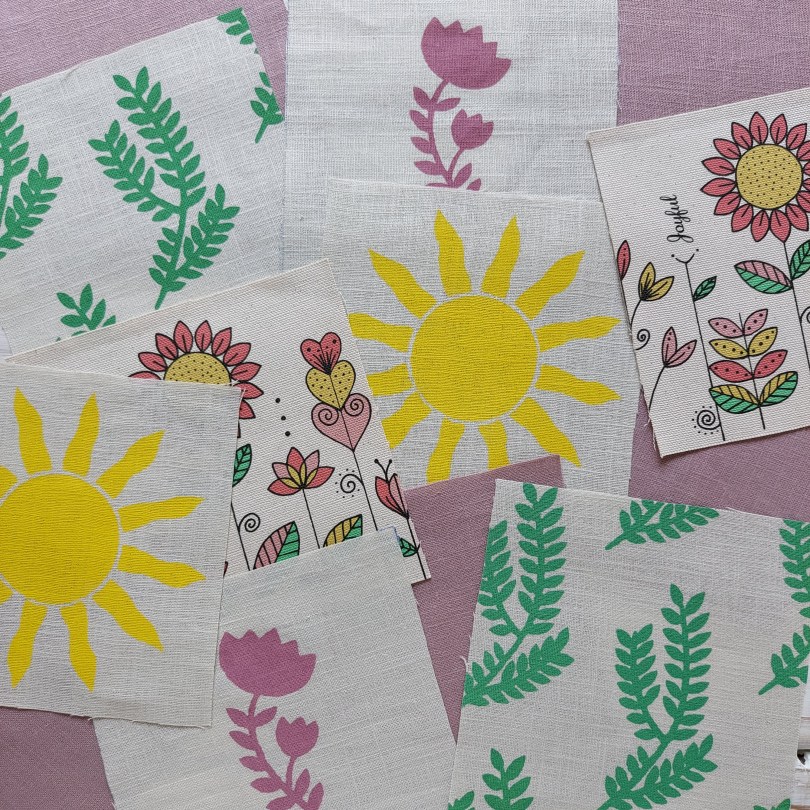
For each square, decide what you would like to print. I used a sunshine and two botanical stencils.
Spray temporary adhesive to the back of your selected stencils and place onto the fabric squares whether centrally or to create a repeat pattern.
Place eco tape around the edges of the stencil to prevent the fabric around the stencil from becoming marked.
Use a stippling brush and fabric paint to transfer the design to fabric.
Carefully peel the stencil away from the fabric.


Repeat for as many squares as you wish.
I created a sorted of drop repeat pattern (without measuring) for the green botanical, printed just one pink botanical and one sunshine per square. I printed two squares of each of these designs.
Allow to dry.
Cut out the printed fabric squares and any further squares of fabric you wish. I used ‘joyful flora’ fabric I had printed last year to create 2 more patterned squares and a dusky pink linen fabric to create 8 plain squares.
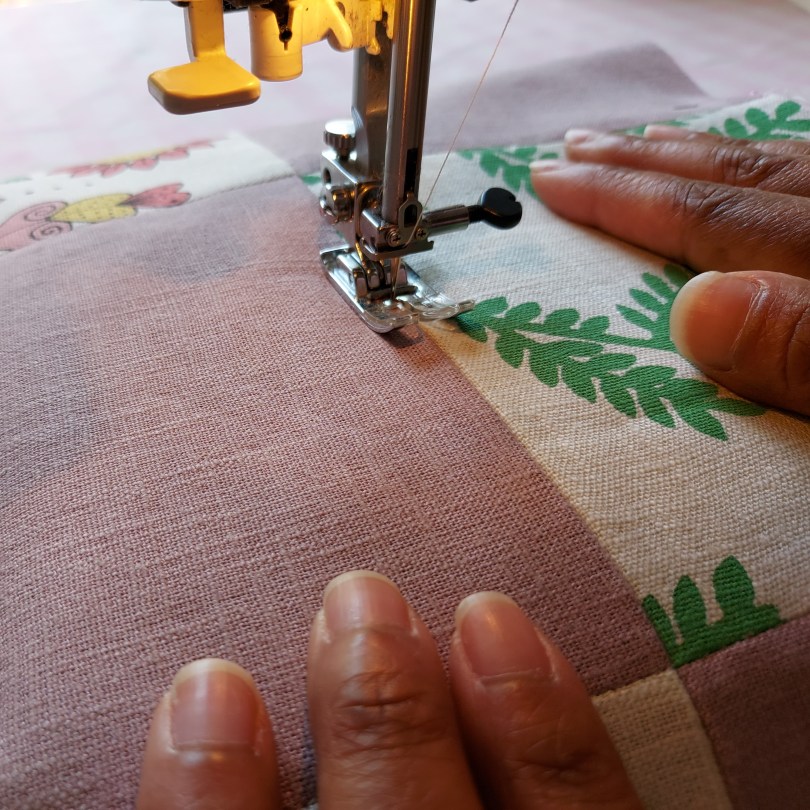
Join the squares using a sewing machine. I sewed my squares together in a 2 by 8 pattern, with the plain pink squares in between each patterned square.
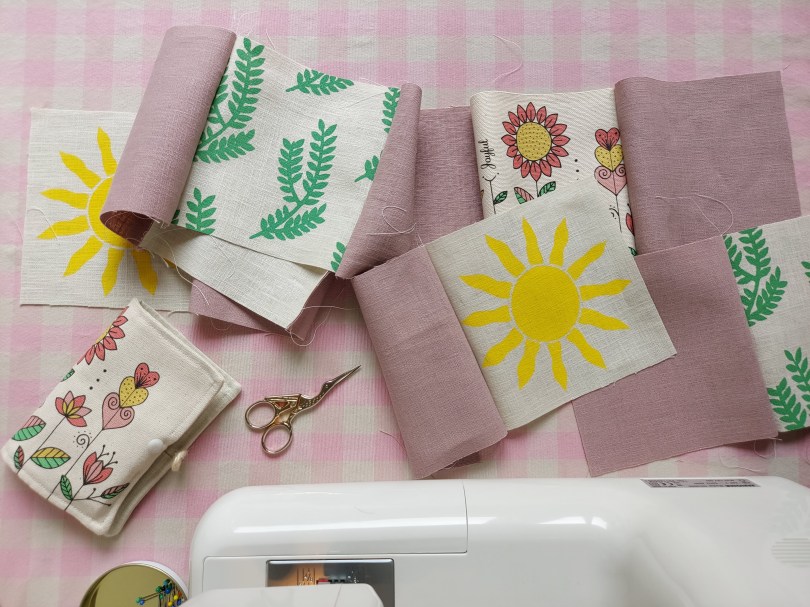

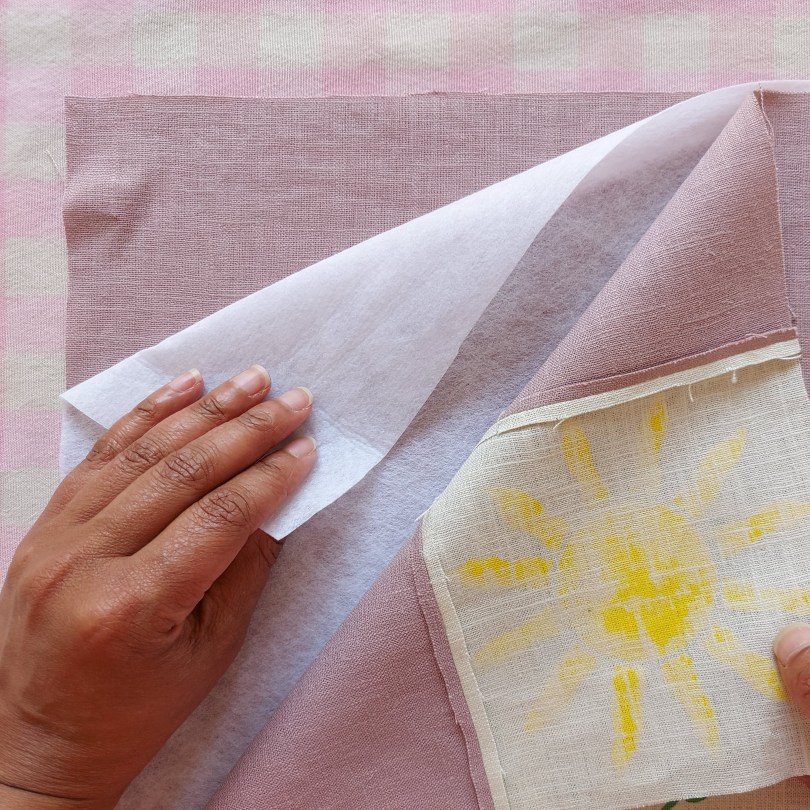
Place the joined squares on top of the interfacing (I used Vlieseline/Vilene M12) and backing fabric (I used the pink linen), pin and cut out these layers.
Top stitch to join the layers – there are lots of different ways when creating a quilted project. I ‘stitched in the ditch’ – i.e. the seams between the squares.
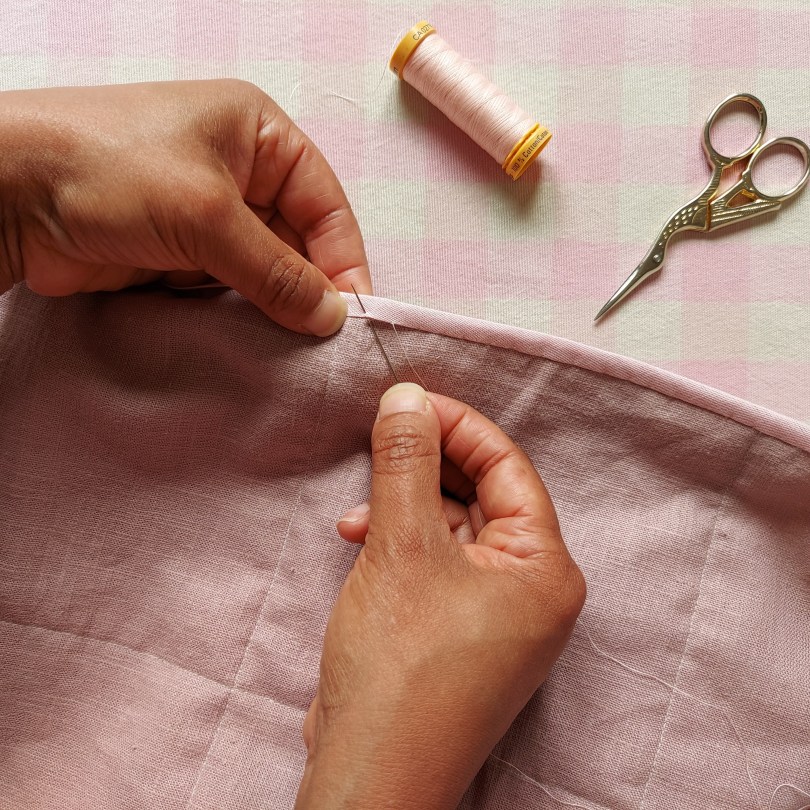
Add bias binding to the edge to finish.
Both fabric projects were an absolute joy to make. You already know that I adore embroidery. but quilting is a new one for me and I’m smitten. I’m dreaming up more printed fabric and quilting escapades as I write this!
Onwards…
I hope you may be inspired to try stencilling yourself. Let me know and tag me if you do!
Thanks for being here.
Love and warmth from me to you always,
Lucy
xxxxxxxxxxxxxxxxxzzzzxxxxx

